

Epoxy flooring specialist with over 25 years of experience helping residential, commercial & industrial projects.
Want to install an epoxy garage floor in your home? Today, we will guide you on installing a luxury epoxy garage floor system for residential garages. A high-quality epoxy garage floor system is an excellent way to transform your residential garage into a functional space. This process involves multiple steps that ensure the durability and longevity of your epoxy flooring. Read on and learn how to install epoxy garage floors properly today!
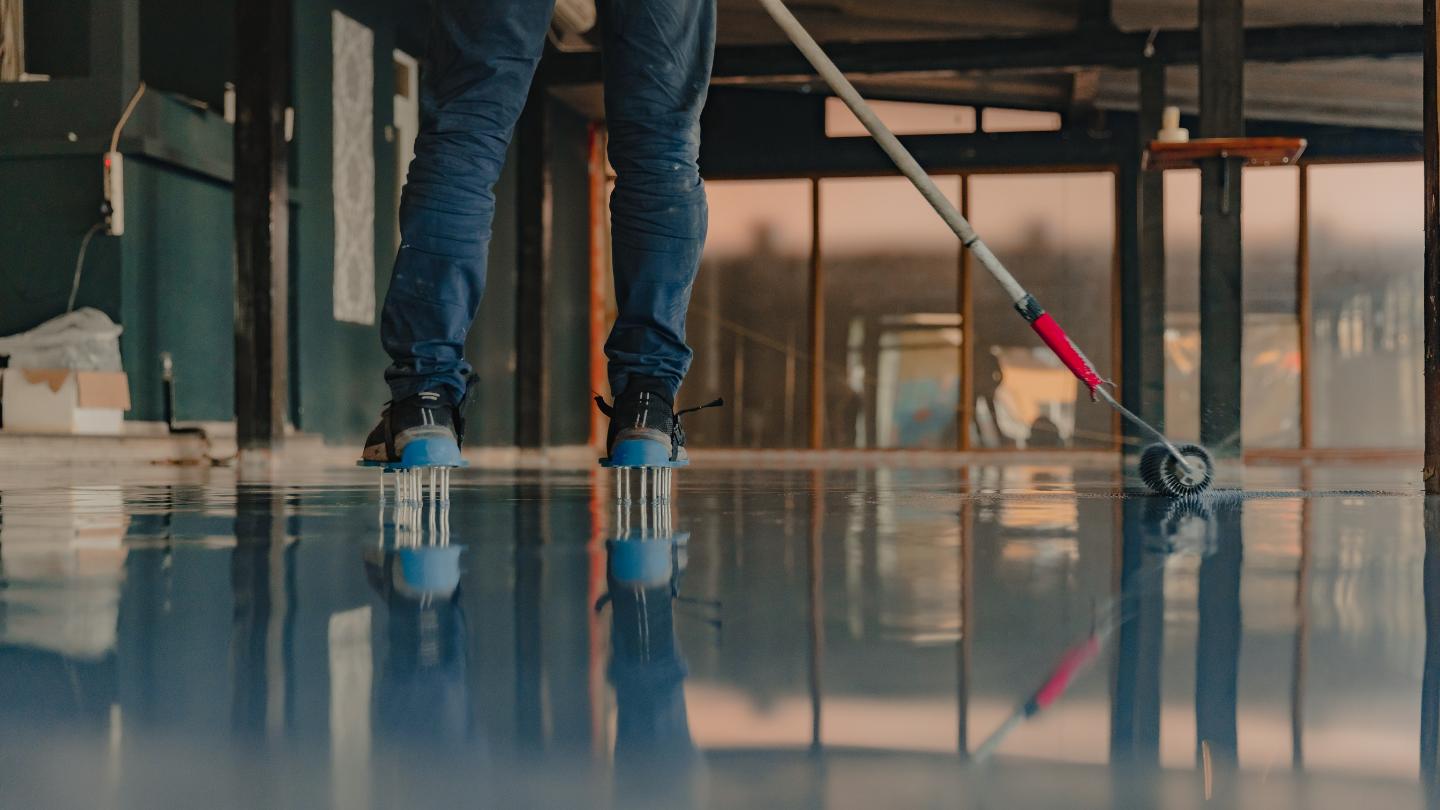
Get ready to transform your garage with these epoxy flooring tips.
Clear out everything to create a clean canvas for your epoxy masterpiece. Need some decluttering tips? Check out this guide by HGTV.
Don’t let your walls become victims of epoxy splatter. Use painter’s tape to shield them from any accidental mess.
Before you coat your floor with epoxy goodness, make sure to tackle those pesky oil and grease stains.
They’re like the villains of adhesion.
Use a powerful degreaser like Simple Green All-Purpose Cleaner to save the day.
It’s safe for indoor and outdoor use, so you can confidently conquer those stains.
With proper preparation, your Vancouver garage will be rocking a durable and visually appealing epoxy floor in no time.

You must etch that concrete floor to ensure your epoxy sticks like glue.
Acid etching is the game’s name, roughening the surface for a flawless epoxy application.
Take safety seriously—no exceptions. Suit up with gloves and goggles when handling those acid-based products. And let some fresh air in by opening doors and windows in your garage.
Call the pros, like the Epoxy Flooring Vancouver, if you’re unsure or ill-equipped to handle yourself.
Now it’s time to apply that acid etcher.
Grab a watering can or a similar tool and spread it evenly on your concrete floor.
Just make sure to follow the manufacturer’s instructions on dilution rates and application methods.
Remember, patience and attention to detail are the secret ingredients for a smooth, durable finish on your brand-spanking new epoxy garage floor.

A clean surface is a must before applying epoxy flooring.
It’s like giving your concrete floor a spa day, ensuring a long-lasting and durable bond. Here’s how to make it squeaky clean:
Grab a broom and sweep away all that loose dirt and dust from your garage floor. For those stubborn debris, a heavy-duty push broom will do the trick.
After sweeping, give your floor a thorough cleaning with a shop vac. It’s like giving your floor a spa-grade treatment.
Give your floor a final touch by rinsing it with water. This will wash away any remaining dust or particles that escaped the broom and vacuum.
Treat stubborn stains with appropriate cleaners like degreasers or detergents if stubborn stains are left.
Think of it as a spa treatment for those tough spots.
Don’t forget, cleanliness is the secret to a successful installation.
When it comes to applying an epoxy base coat, precision is key.
Mix the epoxy and hardener properly, or you’ll have a sticky situation.
Follow the manufacturer’s instructions to avoid a less-than-desirable outcome.
Getting the right proportion of epoxy and hardener is crucial.
Too much or too little of either component could lead to a cure that’s as wonky as a rollercoaster ride.
Don’t dilly-dally after mixing your epoxy and hardener.
Don’t wait too long after mixing your epoxy and hardener; you’ll have a sticky mess to clean up.
Use a roller brush or squeegee applicator tool to ensure a smooth and flawless finish.
Start from one corner and work your way towards the exit point, like a pro surfer riding a wave.
Remain vigilant in keeping the edges wet so that no dry patches appear, or else they’ll be conspicuous.
Nobody wants a patchy floor unless you’re going for a polka-dot theme.
The final step in jazzing up your epoxy garage floor is slapping on a topcoat to protect those fabulous color flakes.
It’s like giving your floor a superhero cape.
Before you get started, follow the manufacturer’s instructions to mix your topcoat material.
Don’t mess this up, or your floor might throw a tantrum.
Some topcoats even come with anti-skid additives for extra safety.
No more slipping and sliding like a clumsy penguin.
Now comes the fun part: applying the topcoat.
Start from one corner and work your way out like a pro.
Don’t walk in wet areas unless you want to leave your footprints for eternity.
Use a roller or brush and apply evenly without overlapping too much.
We don’t want any lap marks ruining the party.
A well-applied topcoat protects those gorgeous color flakes and adds years of durability to your garage floor.
Remember, patience is key. Attempting to finish a marathon in heels is an impractical endeavor. Not a good idea.
Here at Swift Epoxy Flooring Vancouver, we have you covered when installing a luxury garage floor epoxy system.
Our pros can handle the job seamlessly for you.
Skip the guesswork and DIY headaches.
Let’s chat today!
A unique aspect of this process is sprinkling color flakes onto the wet second layer of the applied coating. Not only does it add aesthetic appeal, but it also provides texture to prevent slipping once dried.
To achieve an even spread, you need a systematic approach in distributing these color flakes.
Start from one corner and work across the floor, ensuring each area gets equal flakes.
It’s like sowing seeds on a field – you want them evenly distributed for optimal growth or, in this case, coverage.
The size and density of the flakes can vary depending on personal preference.
Some prefer larger flakes for a more pronounced visual impact, while others opt for smaller ones for subtlety.
The key here is consistency; maintain uniformity in your distribution pattern to prevent patchiness.
Timing is crucial, too – sprinkle these colorful epoxy chips while the base coat is still wet so they adhere properly.
If you’re worried about making mistakes or uneven application, don’t fret.
You can always add more later or sweep away excess before applying the topcoat.
However, adding too much may result in a bumpy surface instead of the smooth epoxy flooring.
Epoxy garage floors can be slippery when wet, so be careful not to turn your garage into a skating rink.
Professional installation is recommended for the best results unless you’re a DIY daredevil.
Watch out for UV light, which can cause epoxy floors to discolor, turning your garage into a psychedelic disco.
Ensure your garage floor is well-prepared before applying epoxy, or it won’t stick like a stubborn piece of gum.
Absolutely. Epoxy coatings provide a durable, stain-resistant finish that will make your garage the envy of the neighborhood.
Plus, it increases the value of your home, so you can brag about your fancy garage at the next neighborhood block party.
If you’re planning on hosting monster truck rallies in your garage, you might want to consider a more heavy-duty flooring option.
Extreme temperature fluctuations can also cause problems for epoxy, so if you live in the Arctic or the Sahara, you might want to explore other options.
Yes, you do. Think of it like preparing a canvas before creating a masterpiece.
Clean and etch the concrete surface properly, or else your epoxy coating might peel off like a bad sunburn.

We are proud to bring all of our amazing concrete coatings to our neighbors in Vancouver with a strong warranty and a free quote.
Call Us Now!
(604)-265-7362